Tuesday, June 8, 2010

Buzz, buzz, buzz...

Today I finished up my first June block for Lael for my Honey Bees quilting bee.


(Click on the picture to see it bigger. No, really. I'll wait.)


I must have been crazed to pick such a block, but once I started it was too late to turn back. I found a paper-piecing template online that was adorable, and I didn't let all the teeny tiny pieces scare me off. (Ignorance is bliss, I tell ya'.)

It said it would make a 10" block. It did not.

No problemo -- I added white sashing, which I wanted to anyways, to make it 10". It is not absolutely perfectly square because it will not lay absolutely perfectly flat, which is driving me bonkers, but due to the extreme cuteness of the block, I'm hoping Lael will not mind...

Do I love this block?

Oh heck yes and then some.

And I am dang proud of myself, if it's okay to admit that. I would've never been able to attempt this except for the paper-piecing skills I learned over the past year in my other quilting bee. (Thanks, girls!) The three pages of templates that printed up were not the same scale, so I had to have my husband try and recopy them to match scale-wise. (So if you get a wild hair and think you want to click over and attempt this block, keep that in mind. If you don't rescale them all to match, it won't work out.) There was a lot of seam-ripping, a lot of holding my breath, and a lot of please-Jesus-let-this-turn-out-after-all-this-effort going on. Jesus might have a few bigger matters in the world to attend to, but that didn't stop me from hoping He wanted my block to turn out okay. Ha.

The second block has not been started, but it probably won't be quite as intricate as this wonky little farmhouse, just to put that out there. What to do, what to do...

Monday, June 7, 2010

Pickin'.

This morning I awoke to a darkened bedroom and the sound of thunder.

Normally I would think it was heavenly as I prefer gloomy dreary days sometimes, the better to cozy up in. You know the type, perfect for reading a fantastic book under a quilt, taking a nap, cleaning the house (if I'm so inclined to), cooking and baking and the like. Especially in the summer, as cool rains are a refreshing gift. But not today.

I groaned when I saw the rain pouring down outside my window. Today was supposed to be blueberry pickin' day, my absolute favorite summertime activity!

My mom is always up for blueberry adventures as well (we traipse out every stinkin' year), so we agreed to hold out and hop in the car as soon as the rain let up. Sure enough, around 9:30am, it was lookin' pretty good, so we sped off east of town and hoped for the best. We are serious about the blueberries. Real serious.

When we got there, all was right with the world. After a week of sultry nasty temperatures (at least in my opinion it is too dang early to be this hot here) we stepped out of the car into cool temperatures. Such a nice relief. My mom and I both had our rainboots on as we are seasoned berry pickers, and the boy was prepped and primed to search "only for the dark blue ones -- no purple, no red, no green". We were ready to muck through the rows of bushes in search of big fat berries.

I don't know if you've ever picked blueberries, but it is by far the most pleasant of all berry picking. No thorns, no seeds, and the ripe berries practically jump into your hands. I am what most would call a picky berry picker, searching long and hard through the bushes to find the clumps of the fattest and darkest berries. So is my mom. My boy could care less and popped about seven berries in his mouth for every one that made it to the bucket. But he was happy off on his own adventures down the rows of bushes, searching high and low for cool bugs and the "bestest bewwies". Um, let me just say, compared to us picky berry pickers, I don't think my boy could get hired on in the quality control department. Ha! But he had fun and loved it, and that's all that matters.


(Please try and refrain from jealousy of my awesome blueberry pickin' outfit or my puffier-than-all-get-out-because-of-the-humidity-awesome-hairdo or my don't-you-wish-you-had-on-sunglasses-to-shield-your-eyes-milky-white skin.)

We were the only ones there for quite a while, and it was so nice and peaceful. We each split up on one long row, and it was kind of nice to have our own little space. The only sounds were the chickens and livestock around the property, and there were two ducks a couple of bushes down from me, taking a bath in a giant puddle.


If it wasn't the most perfect Charlotte's Web/Laura Ingalls type scenario, well, I don't know what was. I half expected Wilbur to come sauntering down the path and join the ducky couple in the puddle. Now, I'm sure as far as blueberry pickin' experiences go, pickin' in Oklahoma isn't quite the same as if we were pickin' in Maine or Michigan or other states known for their blueberries, but for us Okies, it was quite idyllic.

At the end of our adventures (less than two hours worth, although I would've stayed there all day if I could've), we had plenty of berries to show for our labor. My mom and I each picked two buckets full -- about five and a half pounds each -- and the boy had almost a pound and a half in his little bucket (as well as probably that same amount in his belly!). And the best part was they were already rinsed off from the rain. Can't beat that with a stick!


This afternoon I've been drying them off and bagging them up to freeze so we'll be able to enjoy our spoils throughout the year. I'll keep some of them fresh and make some of that divine Pioneer Woman cream sauce tonight, and we'll be livin' high on the hog with our little blueberry stash. You could dip cardboard in that cream sauce, and I bet it would taste divine. And the rest of the summer I'll be daydreaming about my second favorite fruit-picking experience -- picking the Honey Crisp apples and golden raspberries come autumn in our beloved Minne-SOH-ta.

Ah, berry pickin'. Nothin' quite like it.

Thursday, June 3, 2010

'Tis a gift to be simple...

Even though I specifically requested no presents for my birthday, it was inevitable that some people in my life would defy my orders. I guess some people just have minds of their own. Ha.

Anyway...

remember how I told you I have some amazing friends?

Yep, the girls in my life are uber-talented. I'm constantly spurred on by the creativity I'm surrounded by. (And I'm including all of my cyber-friends in this statement as well! Constant inspiration, I tell ya'. And remember, I'm a copycat.)

Check what my girl Katie made for me!


Okay, so she didn't exactly make the adorable Alice in Wonderland plate...


but the clever girl DID turn it into something even more fun! She bonded it to a glass candlestick and turned it into a tiered cake plate! Cute, right?

Never in a million years would I have thought that one up. But you can bet your bottom dollar that I will be keeping my little crafty eyes peeled for cute plates and candlestick holders in order to copy this idea!

I am going to use it in my crafting dungeon rather than only drag it out for food purposes. I think it would be quite lovely holding sewing notions or something like that, don't you agree? Then I can see it every day. Seriously, she knows how to pick 'em. Alice in Wonderland? Love it. Goes with my bloggy blog title? Love it. Aqua and red? Love it. A winner all around.

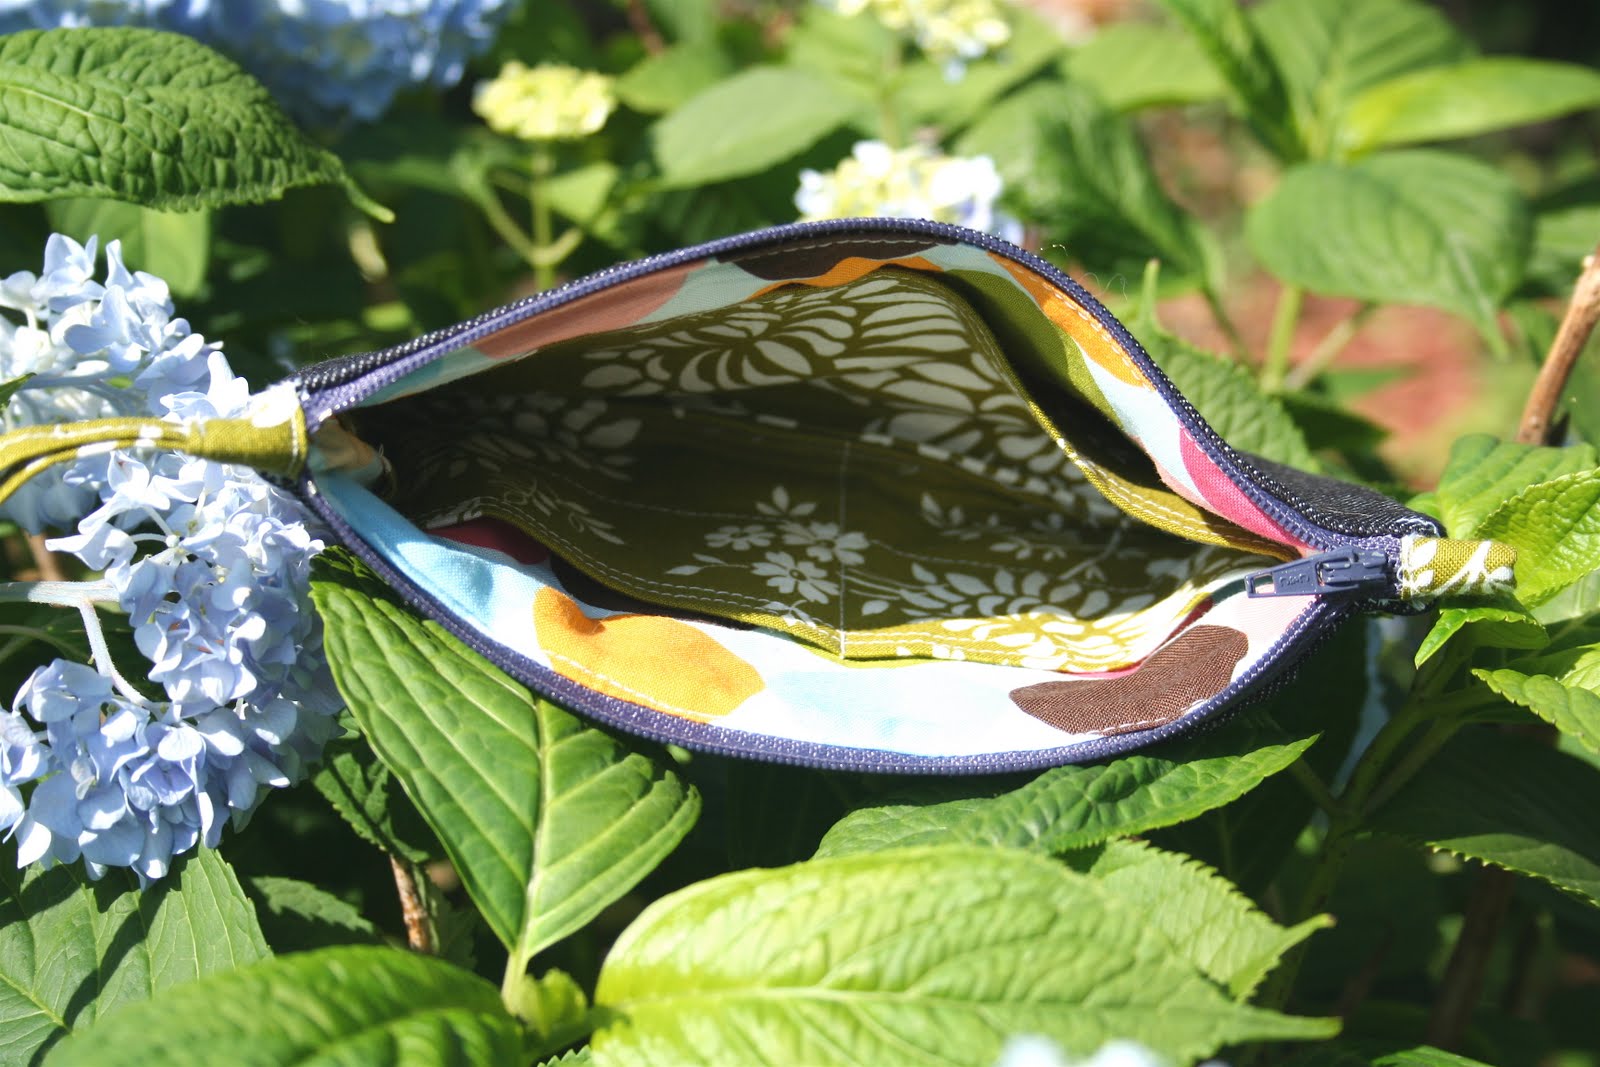
Katie, in turn, had a birthday this past week, so I seized the opportunity to whip up a little something from a tutorial I had bookmarked on my laptop. A cute little gathered clutch, complete with dividers and card/driver's license pockets!


Who dreams up these stinkin' cute tutorials anyways? If I had to make a tutorial, it would pretty much end up being a tutorial of how to watch paint dry because I rarely come up with clever ideas on my own. But my friend, Katie, she is so nice she would probably tell me it was the best paint-drying tutorial she'd ever seen! Oh yeah, she's super nice like that.

Thank goodness this turned out. I'm the type of dope that tries something new in the 11th hour -- you know, like trying out a new recipe right before guests are coming over with no back-up plan whatsoever, not even frozen pizza.

Yep, that's me.

And this tutorial involved a zipper {insert violent shudders here} and not only that, but it required me to cut my own zipper to the correct length {insert wailing and gnashing of teeth here}. Both of which I survived by following the steps one at a time. Baby steps, people. I got this finished with baby steps.

Now I have no idea what I was supposed to really do with those fancy zipper tabs. I couldn't figure that step out, so I fudged it. And I added a strap to make it a wristlet. {Cue choirs of heavenly angels and sunlight streaming down from heaven.}

And now I totally want one for myself.

Who's got a birthday comin' up? I've got loads more tutorials I'm itchin' to try out...

Rule-breaker

Remember in school how it was NOT okay to copy?

Well, now that I'm an adult and I'm in charge (picture Eloise, hands on hips, in the middle of the Plaza Hotel type of take-charge-attitude)...

I love to copy. Ideas. And I always try and give credit where credit is due.

And in true copycat fashion, I snagged a great idea for this summer.

This gal writes one of my favorite blogs. If you haven't met Meg before, click on over and start following! She's got a great attitude, fun ideas, and is one funny lady. She's done this idea every summer, and I knew it was the perfect thing for our family this year, especially since it is the last summer before my boy {sniff, sniff} starts his big kindergarten career.

Check it out...


(As always, you can click on the picture to read it more closely. If you have x-ray vision, you should be just fine...)

Growing up, summer was always something to look forward to. NO SCHOOL! As a parent, well, um, my attitude might not always be quite the same. Sure, I'll admit it -- it scares me to think, how in the heck am I supposed to entertain my kid all summer long?

Don't judge me. It's a tad bit harder with an only child since I am mostly his only form of entertainment.

Anyway, like Meg says in her blog, this is a way to keep things more intentional. To make a point of getting out and having fun -- fun which doesn't always have to cost anything. Many of the items on our chart don't cost much at all.

So, that's what we're doing. This poster is taped up on the walls of my little guy's bedroom, ready to get those boxes checked off. The best part is, I'm just excited about it as he is! Even my husband jumped in the fun and helped think of things to add to our list. I wonder how many we'll be able to accomplish?

What about you? How do you make summer more fun?

Saturday, May 29, 2010

A quick birthday shout-out...

...to two of my favorite peeps! I just so happened to snap a beautiful little shot of the two of them at my party last weekend. And seriously, I have the coolest friends. You should be jealous.


Katie (on the left) is turning the big 3-0 today. Happy 30th Birthday, Katie!!!!

Courtney (on the right) has a birthday coming up this Friday. Happy Birthday, Spud!!!!

Don't worry, she lets me call her Spud. She calls me the same thing. We go way back, maybe to my middle school years even, but since I have the world's worst memory of anything that matters (and the world's best memory of useless information), don't quote me on that. Don't you love having history with friends and funny inside jokes? I do. Just thought I'd clear that up in case you were wondering if I call all my friends potatoes...

Friday, May 28, 2010

Little Dresses for Africa (Part Dos)

(Otherwise titled: All you ever wanted to know about the decor and the organization)

Having a party like this, I knew that it would have to be uber-organized. And I am not known personally for being so uber-organized. Deep down I knew I had it in me, so instead of waiting until the last minute to work on it, I started three weeks before the actual date of the party to get my act together.

Thank goodness. Otherwise I would have been toast.

I sent out an Evite, but I knew that those things are only so-so when it comes to accuracy, not on Evite's account, but on account of how many people in today's day and age actually RSVP. I had to guess at how many girls I thought would be coming and plan accordingly. I wanted to make sure I didn't run out of supplies because it was important to me that each partygoer had at least enough supplies to finish one dress.

I decided to have it at my house to keep the costs down, but doing so I knew I would need to set up different steps in different rooms to help with traffic flow and making sure everyone had enough space to work. I utilized my front yard by setting up the clothesline and clothespins (yay Dollar Tree!) -- clipping up the finished dresses provided all the cute we needed to decorate the outside of my house. And you wouldn't believe how many people drove sloooooooowly by, surely wondering what in the heck was going on! I also made the party a "come and go" operation, figuring that would also help in traffic flow and less congestion.

For decorations inside, I had seen the most adorable mobile tutorial on this blog, so I copied the idea, but instead used a cardstock pack from Michael's. I wished I could have found colored vellum, but it would've taken way too long to find that many colors and would've been a lot more expensive. The total cost for all of my mobiles (the ones hanging in both my kitchen and in the dining room) was less than $3. The paper pack just so happened to have the five-color combination (called "Soda Pop") that matched my favorite colors in my house, so it worked out perfectly.

To make the mobiles I cut the 8.5"x11" pieces of cardstock into 1" strips horizontally, getting 11 strips per piece of cardstock. Using one piece per color (5 total) I had enough to make 2 mobiles -- one with 5 strips of each color, and one with 6. In total I think I made 14 mobiles. I just stitched right down the center of the strips (taping a piece of masking tape on my machine ahead of time as a guide for where the center of the strips would be) leaving maybe 1/4" or so between each one. On the tutorial they mentioned tying on a fishing weight at the bottom both for adding weight to make them hang better and for looks, but my cardstock mobiles didn't need them so I skipped that step. We taped them up to the ceiling with masking tape, finding that wrapping the thread around the piece of tape at least twice helped keep them up there without slipping through the tape and falling on the floor (we learned the hard way). I also printed off pictures from the Little Dresses for Africa website, backed them with the same colors of cardstock and hung them from the chandeliers, one picture on each side. Easy peasy.


For the party, I set my mom, my aunt, and my friend, Christa, up in the dining room with their sewing machines. It was a good central location for the partygoers to come back and forth from the steps in the other rooms. By having three seamstresses on hand, it made it possible for even my non-crafty-loving friends to be able to participate because no one was required to sew. Without my amazing seamstresses, the party would have been a flop.


There were five steps total for the pillowcases. Each step was set up at its own station and had detailed instructions printed out on paper and backed in matching cardstock. I had hoped to have pictures of each step printed to make things easier, but alas, I ran out of time and that never happened. But as my friend, Courtney, wisely pointed out, it wasn't a problem -- once one person learned how to do it, they could in turn demonstrate and help the next person, and so on and so forth.

Step One was set up in my living room. There were two tables set up with a cutting mat, clear ruler and rotary cutter. This is where the top end of the pillowcases was sliced off (not the bottom open end which was already hemmed perfectly for the bottom of the dress). The girls could pick from different lengths to make their dresses for various sized little African princesses.


Step Two was set up in my boy's bedroom. There was a table with cardboard templates to trace and cut out the armholes from the top part of the pillowcase. Again, easy peasy.


Step Three was set up in my master bedroom. We had three ironing boards and irons ready to go. Step Three involved turning down the top hems in a double-fold of 1/2" each. After those were ironed down, the pillowcases were taken to the seamstresses in the dining room to have the casings stitched. Then it was on to Step Four.

Step Four was back to the living room where a jar of elastic was set up. Partygoers were instructed to grab a pair of 6" pieces of elastic, safety-pinned together. The elastic was then fed through each casing and taken back to the seamstresses to be tacked down on the ends. There were a few laughs over elastic that got lost in the casings, and more than one frustrating moment of having to get out the ol' seamripper and dig in there to find the elastic. This was probably the trickiest step, but everyone plowed through.


And finally, the best part, Step Five -- the "Trim Bar". I had my kitchen island covered in trim options. There were jars filled with ribbons and trims, a bowl of iron-on appliques I had pre-made, and pairs of bias tape to pick for the straps of the dresses. Oh girls, I had bought bias tape package after bias tape package after bias tape package! It's a wonder any was left in our fair city! Thank goodness for the sale at Hancock's where it went 50% off. One package of bias tape is enough for 1&1/2 dresses, so I always bought it in pairs since you could get three dresses out of two packages. It was fun to see everyone's individual tastes come out and see what they picked to gussy up their little dresses. Once their choices were made, they took their dresses back to the seamstresses to have the trims added and the bias tape straps sewn on. And of course, after that, everyone enjoyed pinning their finished dresses up on the clothesline in the front yard.


But what would a party be without food and drink? And party favors?

I had a "snack station" set up as well. I knew that with all of the chaos of fabric and trim and everything else going on all throughout my house, I needed to have something simple and non-messy for sustenance. So I made "salted caramel crunch brownies", bagged them up, and clipped the bags closed with a napkin using the party favors -- clothespin magnets. There was chilled bottled water to take as well. This way the guests could either take their snacks to go with them, or they could grab one, find a spot to sit, and enjoy a moment of chocolate.


This is a picture of similar clothespin magnets we made last year at Courtney's awesome birthday party, just so you know what in the heck I am talking about. Cheap, easy to make, and useful for everyone. Can't beat that with a stick.


Part Tres will be up tomorrow, I hope! To catch Part Uno, click here.

Thursday, May 27, 2010

Little Dresses for Africa (Part Uno)

It was recently my birthday as you know, and I threw myself a dang good party!

(No, I'm not usually that vain to throw myself a party, except when I turned the big 3-0 a couple of years back, and then it was practically mandatory! I'll not soon forget that awesome bash at the roller rink...)

But this wasn't any ol' party. The birthday part was just a great excuse to get together and make a difference. And yes, my guests were required to bring a present 'cause, come on, who doesn't love presents?!

(No, I'm not that greedy, keep on a-readin'...)

But not just any ol' present. A pillowcase, to be exact.

My birthday celebration was a "Little Dresses for Africa" party!

I first heard about this organization through Ashley's amazing blog. Let's face it, she's the queen of crafty and cool, and I was drooling over her party pics. Ever since, I've been itchin' to throw a party, and since this was my year to turn 33, I knew I'd found the perfect excuse. When you're turning the same age as Jesus, you gotta find a fitting way to celebrate, and I know Jesus would approve this party!

We transformed ordinary pillowcases into dresses fit for little African princesses. There were three trusty and determined seamstresses on hand to help sew them up, so no sewing skills were required from my guests. When the party was over, we had 38 finished dresses hanging on the clothesline in my front yard. Amazing, right?!


But what's even more amazing is the fact that, as of today, there are 75 finished dresses, with about 25 more to be finished. That's right, kids, there were approximately 100 pillowcases donated in honor of my birthday.

100.

Can you even imagine?

100, people!!!!!!


Just picture it -- 100 beautiful African princesses of God standing in their new dresses. If that isn't one of the most beautiful images you could ever conjure up in your head, I don't know what is.


(images from the Little Dresses for Africa organization website)

This could never have been possible without everyone else. A huge thank you to all of my guests for coming and participating and bringing the most awesome pillowcases. An even bigger thank you to my friends that went above and beyond, collecting pillowcases out the wazoo, inviting even more friends to come, and for friends that contributed fun additions to add to the dresses, like my friend, Kristi, who made a ton of adorable flower brooches to put on them. We used every single one of them, Kristi! And a humongous thank you to my mom, my aunt, and my friend since the 5th grade, Christa, for sewing up a storm, in what my aunt dubbed "the sweatshop" (aka my dining room). These ladies never once took a break and went well past the end time of the party trying to get as many finished as possible.

I seriously thought my heart was going to burst into a million little pieces from the sheer happiness I felt all throughout the party. The thought of seeing our adorable creations on even more adorable little girls was just too much. I am still on cloud nine even days later.

A big fat muchas gracias from me on behalf of some amazing little girls across the globe.

Look for Part Dos and Part Tres and heck, maybe even Part Cuatro later this weekend. I've got a bazillion more photos to share -- how I set up the party, the beautiful women in attendance, and of course, all 100 of the creations!

Get ready to fall in love with pillowcase dresses. And with parties that show how amazing the hearts of people can be.